
Every geeky guy wants to know how to Change MAC Address on Android. The number of Mac address questions we receive per day prompted us to provide a step-by-step guide.
What is MAC Address?
MAC stands for Media Access Control address. It is a unique set of numbers that devices use to identify themselves on the network. (usually 6, but can be up to 12)
For example, your computer’s MAC Address is needed when you try to access wireless internet. If you don’t put in the correct MAC address, then the router won’t let you on the internet. So, if you are trying to secure your wireless network, then it is important that each device has a unique MAC Address.
Also, make sure that USB debugging is enabled from settings> applications> development. If it’s not activated then, go to settings > about the device and click on build number seven times until it says “you are now a developer”.
Note: Please follow the steps correctly. If you don’t, then I can’t guarantee the complete functionality of your phone. I will not take responsibility for whatever happens to you or your phone if you make a mistake.
Benefits Of Change MAC Address on Android
- You can keep hackers out of your wireless network.
- Keep your mobile secure and safe from other devices on the network, e.g. if you are using a public wifi hotspot.
- People won’t be able to track your phone’s I.P address easily, which will prevent them from hacking into your phone or tracking you via GPS.
However, the reasons don’t end here. Let’s move on to the next step.
Change MAC Address on Android Step By Step
Without Root Access
- Open settings
- Scroll down and click on “About phone”

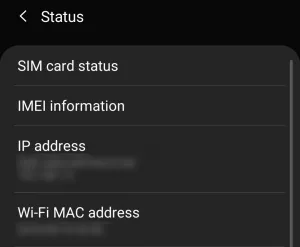
- Scroll and click on status, here you will find the default IP. (Put it on paper so you can enter it in the next step)
- Install Terminal Emulator, and then run the IP link show command. The network interface will appear.
- Enter the actual name of the interface.
- Now run the command “ip link set HAL9000 XX:XX:XX:YY:YY:YY”, it will allow you to write the new MAC Address.
With Root Access
- Download Busy Box and Terminal Emulator.
- Open the terminal emulator app and type in the command “su“.
- Now you need to allow root access to the app.
- Run the command “IP link show”

- Let us assume your network to be “HAL9000”.
- Type in “busybox ip link HAL9000″ In the next command, it will show your current address.
- Type in “busybox config HAL9000 hw ether XX:XX:XX:YY:YY:YY”, it will allow you to change the MAC Address.
- Finished! Now Enjoy!

Conclusion for Change MAC Address on Android
That’s all I have in my mind for this article. I hope it will help you to secure your device and make it a little bit more anonymous. I can’t guarantee that everything will work out fine, but please give it a try and tell me the results. If you find this post helpful then please share it with your friends on Facebook, Twitter or Google Plus and help them secure their device too.
If you have any problems then feel free to ask me in the comments section.


